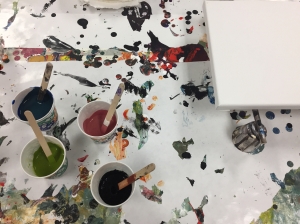
A dry canvas and mixed paint are ready for my first pour painting project.
Pour painting. It seems to be all the rage right now, and classes are popping up all over the place for people to try their hand at it. That’s how my husband, Terry, and I decided to explore the technique.
We found a class in Stillwater, Minnesota, led by Sharon Weiser, an accomplished painter and art instructor. Terry and I spent a couple hours with Sharon testing two different kind of pours.
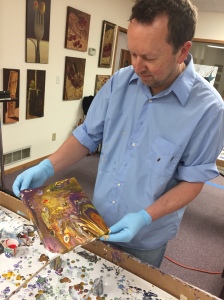
Terry tilts his canvas to arrive at swirls and cells of different colors.
The first pour was on a dry canvas. Using acrylic paint, a flow agent and water, we mixed a few different colors until smooth and drippy. Upon achieving the right consistency, we added just a few drops of silicone to each mixture. Before pouring, we layered each color into a new cup, not stirring it, but allowing the colors to sit upon each other. Then we poured the paint and tilted the canvas to see what design and “cells” would appear. A blow dryer helped with developing the latter.
The second pour was on a wet canvas, which means we applied a thick solid color of paint on the canvas before mixing and pouring like we did the first time around. It was amazing to see how this simple extra step changed the effect pretty drastically!
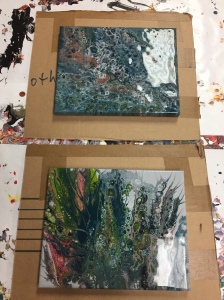
My finished pour painting projects, one on dry canvas and one on wet.
The cons of pour painting? It’s pretty messy, and you never know how it’s going to turn out. The pros? You never know how it’s going to turn out—there is joy in surprise! Terry and I look forward to experimenting some more, even using some of our old house and wall paint and possibly trying some different surfaces—metal, wood, etc.
In addition, I couldn’t help but notice that the older students at our daughter’s childcare center are doing some pour painting on three-dimensional block sculptures. That would be fun, too!
